After taking my bike to the shop a few times and telling them my symptoms of this that and the other and having them making adjustments without any real relief, I decided it was time to look at getting a different saddle. I've had my eyes on a Brooks for a while, simply because it's supposed to be the golden standard of bike touring. However, I don't want to plop down about 100 bucks for something just because everyone else likes it without being sure that I will like it as well. So I decided I should make a genuine effort to measure my sit bones. I found some great ideas here.
I tried the the flour method first, which is basically dumping some flour in a gallon sized plastic bag, placing the bag on a hard surface such as a wooden bench, and sitting on it. I used some old nasty white corn meal I had laying around that should probably be thrown out...
I actually had a hard time distinguishing where exactly the bones started and ended, and tried a few times to get a good impression. After a while, I got the bright idea of using a permanent marker to draw on the bag to take in to the shop with me. I found the dry cornmeal to be very difficult to "read." I tried using less and less, thinking that maybe I could break through the layer of meal and see clearly through the bag where the bones were, but that didn't happen. My next bright idea was to keep only about a cup of cornmeal in the bag and add enough water to it to make it a gel-like consistency that would hold my fingerprints when pressed:
 This worked a bit better, although I still felt like there was quite a bit of interpretation going on:
I also decided to try the damp paper towel and printer paper method. This one was much simpler all around. Put a few drops of water on a paper towel, ball it up super tight to help distribute the moisture, lay it out on a hard surface with the clean dry paper on top, and sit on it for a few seconds.
This is what I got:
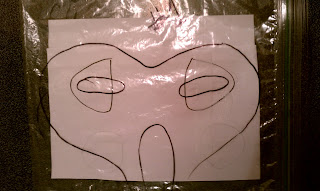
And look what happens when I put the paper behind the bag drawings I made:
What I'm going to call my "pressure zones" are about 7 inches wide. At just about 6 inches at the widest point, my current bike seat has definitely got to go...
I intend to take my baggie and paper to the shop with me when I go to look for a better fitting saddle. I assume it might even be helpful to be able to lay it over a potential candidate and see how my anatomy will line up on it.


No comments:
Post a Comment